Saturday, May 22, 2010

Creature of the Week Tutorial (part 1 of 2)

Hey people who read this! You got a small taste of how it is that I work in the last post I did, but here's a much more in depth look at the way I work. This time doing something I work a little better with: creatures!

So to start off I'll give you the brief this week for Creature of the Week:
A creature that has long sensed the changing of the worlds water and has evolved the ability to carry large amounts of water in its body. The mechanism of storage is the highlight of this challenge and should be your main focus. Does this beast carry it in pouches in its cheeks like some kind of mutant chipmunk? Maybe it has huge balls and nobody could ever figure out why? Bonus points for making the pouches or however this creature carries the water transparent. Size is up to you. Could be a bug, could be a behemoth. Could be a behemoth-bug. Whatever. Make it pretty! Do some research on camels if your in the mood for some reference. Have at it!

So here we go... the following work I did over the course of the last two days. I will be doing this tutorial in 2 posts. The second few stages will be posted tomorrow or monday, depending on when I fully finish up the piece.

STEP 1: Thumbnails:
Sometimes you get a great idea right away and you want to just get started. I had that this time, but it's always great to do a wack of sketches so that you can get some new ideas out there. It really gets your brain working with the topic creatively, and you can generate ideas you get way more excited about than your original. This is what happened with the Aquatic War Beast. Here are the 4 main doodles I did before beginning. Idea 1 was to have some kind of reptilian creature with a large amount of tube-like organs leading into a big tank. Idea 2 is the one I went with, which is to have a creature small enough to carry water droplets without their meniscus breaking. Idea 3 was to have the creature freeze large, hollow crystals onto its back which would store water inside. Idea 4 was to have a two-headed creature with a more cartoony style, where one sucked the water up and one store water in a throat pouch.


Step 2 and 3: Line and Tone
After I've decided on an idea I take a blank "canvas" and start drawing on a multiply layer with a standard round hard brush. I try not to get really in depth with the design at this point, I'm mainly looking for an interesting pose or composition. Something that has a nice silhouette. I decided on this variation on the second design above. I then fill the background layer with a mid-grey. It's a lot easier to establish tone from the middle lighter and darker. I begin to define the form of the creature a little more by creating tone. I used some reference of water droplets to try and get a basic idea of what I'd need to do with it to make it look good... It's a basic start but it forms the foundation of the creature.


Step 4: Basic Colour Scheme
I decided I wanted a sort of red and ash-coloured combo. I new I would have to set the creature on a leafy background and I wanted a colour scheme that would really pop against yellow-greens. Red and purples are the best way to do that. Colours in hand and create a layer and set it to multiply and begin applying the basic colour to everything. It's a good idea, when applying that first layer of colour, to test layer blending options to see which one looks the best. I usually use multiply, but I know others who use soft light, overlay, colour burn, color and vivid light very effectively. I like multiply, but it often flattens shadows to a black-ish tone which is no good, so I often go over the shadows in a more appropriate hue and tone. I then establish a light colour. After that I used a vivid light layer and a chaotic rake brush to make the feelers on it's front tentacles. It was then that I started on the droplets. I applied a light blue to the various parts and began to establish the form of a bug inside the bubble (being digested). After I had it to somewhat reasonable state of colour and tone variance, I used the blur tool to push and pull the forms inside the bubble to give a watery feel. I did a simplified version of the same thing to the small droplet.


Step 5: Establishing context
Now I decided to give the creature a place in the world. I decided on a very basic palette for the background wherein you'd get to see the leaf it was on and some twigs and leaves in the background to establish that the leaf it's on isn't just floating in space. After I did that I decided to establish a bit more yellowy-orange highlights on the creature itself. Simple step.


Step 6: Beginning to Render
Now the fun part really starts. I decided I wanted a bit of a black speckle pattern on the creatures skin/exoskeleton so I used a dot spatter brush to create some basic speckles. I usually start my rendering with the head because it's the focal point of most creatures and when you begin rendering you're usually willing to put more effort forth at the start. So I began the head, I created a new "normal" layer and used a "spatter brush" (which is a lot like a paint brush) with shape dynamics, wet edges and opacity set to pen pressure. I began to create a darker pattern around the head and neck-tubes and then began using a light orangey-yellow to get some highlights in there. I started to create form on the base of the head by applying green reflective light to the creature's underside. I wanted the eyes to look reflective so I added a bit of the reds from the skin into the eyes. It was at this point that I realized: this creature doesn't need a mouth because the water droplet on it's back digests the food. so I made the previous "mouth" into a central eye and made it to match the others.


(this tutorial will continue in the next post...)

Monday, May 17, 2010

Processing a Claymore

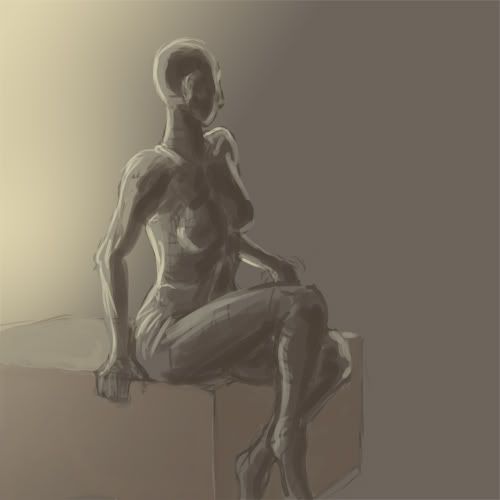
Hey all. Here's something a little different. Here's a few progress shots of me doing a piece of Claymore-based fan art. I can explain bits of the way I work to you through the progress shots.

So I started with a really simple figure study using a reference from a stock photo DeviantArt account. It gave me a basic idea of the forms and proportions, so I just stuch with the basic form. Then I blocked out lights and darks using browns and yellows, which I had originally wanted to be the main hues for the piece.


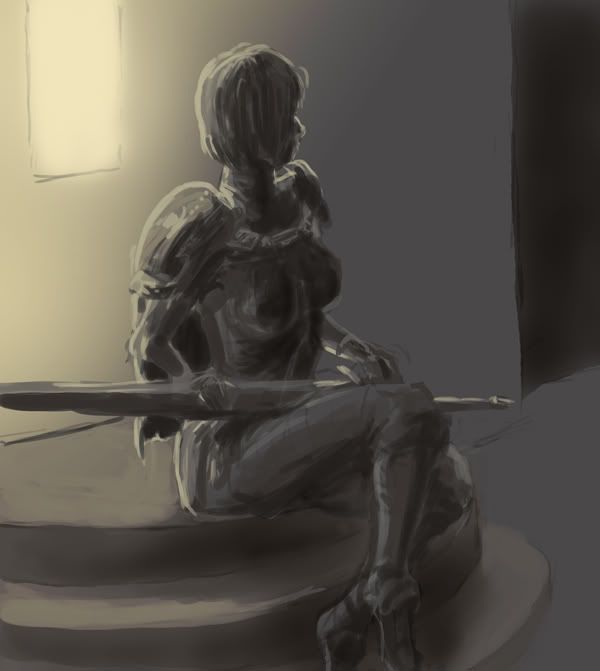
With that in hand, I began to alter the pose to fit with the subject matter (i.e. the character, Clare, from Claymore). I used an outline layer as a guide for where I would have her hair, nose, armor, sword and the repositioning of the hands. I wanted the pose and scene to just have the suggestion of something just outside of the frame so I had this looking away pose. After the outline I painted those forms in. I then created a multiply layer to get some real shadows creating form on the character. I wanted to create a bit better of a scene so I established a very basic background.


There is an image missing on my photobucket account so you'll have to reference this link if you want to view the next step in the process.
http://conceptart.org/forums/showpost.php?p=2740699&postcount=23
I then proceeded to give some more definition to the background. I wanted to establish a warm light source which means cooling your shadowed areas down, so I adjusted some of the levels to bring a more grey-blue tone to the wall. After that I began to apply colour with a combination of multiply, overlay and soft light layers. I used a standard spatter brush with size jitter set to pen pressure and with wet edges set on to create most shapes. I began to define the costume and get some textures into everything. I used a colour burn layer to create the dirt stains on Clare's outfit.

There is a lot I'm skipping here but to summarize, I was playing around with the background and I decided that the out-of-frame intrigue wasn't working and cropped the frame. I then adjusted the head pose for something a bit more atmospheric.
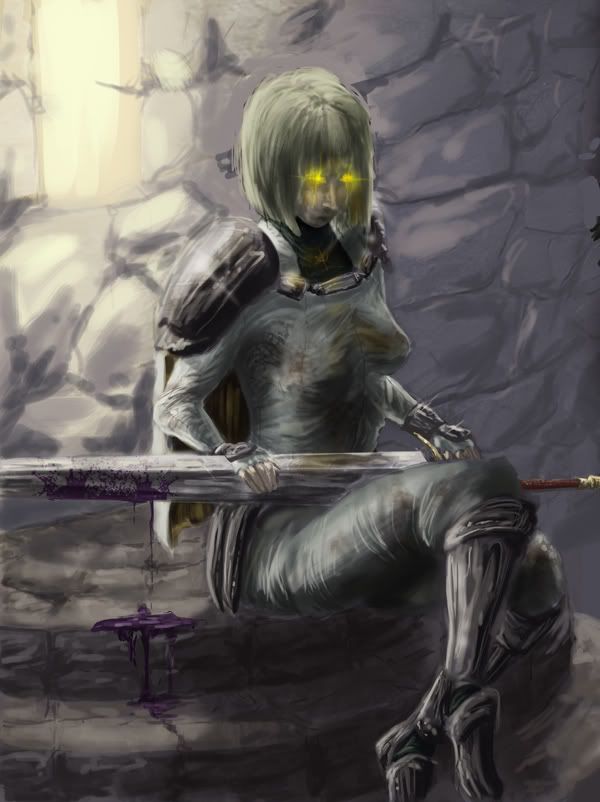
I began to really focus in creating textures for the whole image. I used some photographs of scratched up metal and made some texture overlays to create the textures on the sword and shoulderpads. It was really about refining the details to a decent level of completion and adding little details like the purple blood on her sword.


Finally, I adjusted contrast and did some colour balancing to really make the image pop. then I applied a hard light gradient in a circular pattern on the window, and adjusted the textures on the back wall with a texture brush for dirt. I think applied a gaussian blur to the wall textures to really draw the focus to the character. All told this piece probably took about 5 hours of work.
Here's the final:

Monday, May 10, 2010

Happy Belated Mothers Day!

Hey guys, a couple things today. Firstly is the Mother's Day themed COW we had this week: The Great White Carnivorous Worm with Young. Thus I present the Trench Maw. Looks like a good mother, eh? Keeping it's young in it's large maw, they make up for the worm's lack of teeth by tearing apart prey that the adult traps within it's mouth.
Second up is a small update on that beast you guys saw the beginnings of in the last update.

Sunday, May 2, 2010

Being the Blue and the Purple

Here's an illustration I'm starting on. I really want to get a sense of the scale of the beast the people on their airship are seeing, so I'll be playing a lot with saturation levels to create space.

Here's also the self-portrait, retouched.


Thursday, April 29, 2010

A bunch of things...

Hey. Here are a few random things I'm working on right now. The finished version of the self-portrait is up. There's also some silhouettes from some freeform creature design activities I was doing (I will have some actual freestyle creature design up pretty soon). Then there's my current COW project (NSFW) which is based around the idea of a repulsive creature that, seen in the right light, is able to turn people on. Thus the birth of the titmoth. I'll have a full description with the finished image.


Wednesday, April 21, 2010

Forest Harvester Done

Here's the Forest Harvester now that it's complete. Hope you like it. It's not exactly what I envisioned, but what ever is?

Saturday, April 17, 2010

Well... I totally missed that one...

With the approach of my 20th birthday, as I was sitting here eating a fudgicle I realized that I totally forgot that May Contain Dragons has been around for more than a year now and I missed it's birthday. So I guess... here's to dragons and junk.

Anyway I'm continuing work with my COW entry this week. I don't think I'll get it in on time, but I'll sure try. Anyway, the brief this week was a "forest harvester". Now I'd wanted to work this concept out for a while now (not "forest harvester" but you'll see what I mean), an ursine creature with a thicket on it's back. I thought this may be a great chance to do so. So I started drawing. To work within the concept, the creature wanders forests looking for decaying matter: stumps, fallen trees, carcasses etc. Then it aids the decomposition process by removing some of the energy in the decaying matter by magical means. The energy then enters it's body and aids the growth of the plants on it's back. In turn, the plants allow for it be fed mostly on photosynthesis. Because of it's migratory nature, the trees on it's back function as a very safe environment for certain breeds of bird who nest in deep, firm nests, half-roped to it's branches.