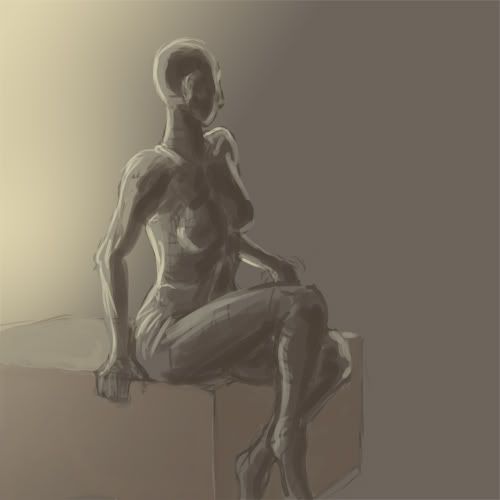
So I started with a really simple figure study using a reference from a stock photo DeviantArt account. It gave me a basic idea of the forms and proportions, so I just stuch with the basic form. Then I blocked out lights and darks using browns and yellows, which I had originally wanted to be the main hues for the piece.
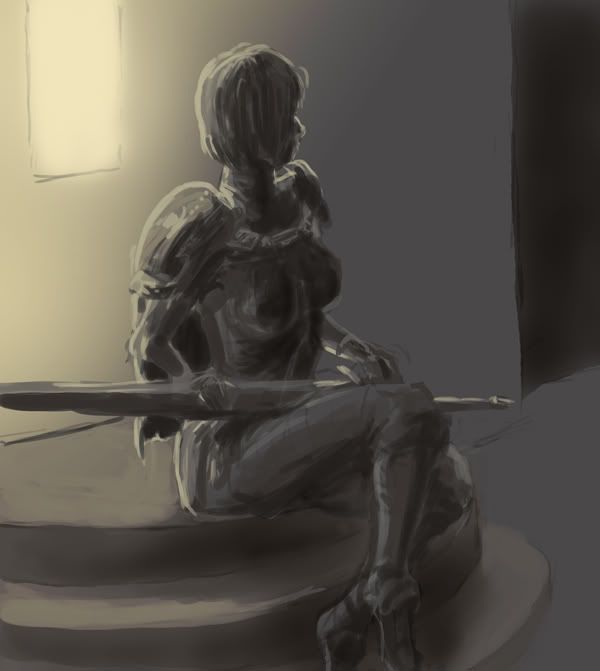
With that in hand, I began to alter the pose to fit with the subject matter (i.e. the character, Clare, from Claymore). I used an outline layer as a guide for where I would have her hair, nose, armor, sword and the repositioning of the hands. I wanted the pose and scene to just have the suggestion of something just outside of the frame so I had this looking away pose. After the outline I painted those forms in. I then created a multiply layer to get some real shadows creating form on the character. I wanted to create a bit better of a scene so I established a very basic background.
There is an image missing on my photobucket account so you'll have to reference this link if you want to view the next step in the process.
http://conceptart.org/forums/showpost.php?p=2740699&postcount=23
I then proceeded to give some more definition to the background. I wanted to establish a warm light source which means cooling your shadowed areas down, so I adjusted some of the levels to bring a more grey-blue tone to the wall. After that I began to apply colour with a combination of multiply, overlay and soft light layers. I used a standard spatter brush with size jitter set to pen pressure and with wet edges set on to create most shapes. I began to define the costume and get some textures into everything. I used a colour burn layer to create the dirt stains on Clare's outfit.
There is a lot I'm skipping here but to summarize, I was playing around with the background and I decided that the out-of-frame intrigue wasn't working and cropped the frame. I then adjusted the head pose for something a bit more atmospheric.
I began to really focus in creating textures for the whole image. I used some photographs of scratched up metal and made some texture overlays to create the textures on the sword and shoulderpads. It was really about refining the details to a decent level of completion and adding little details like the purple blood on her sword.
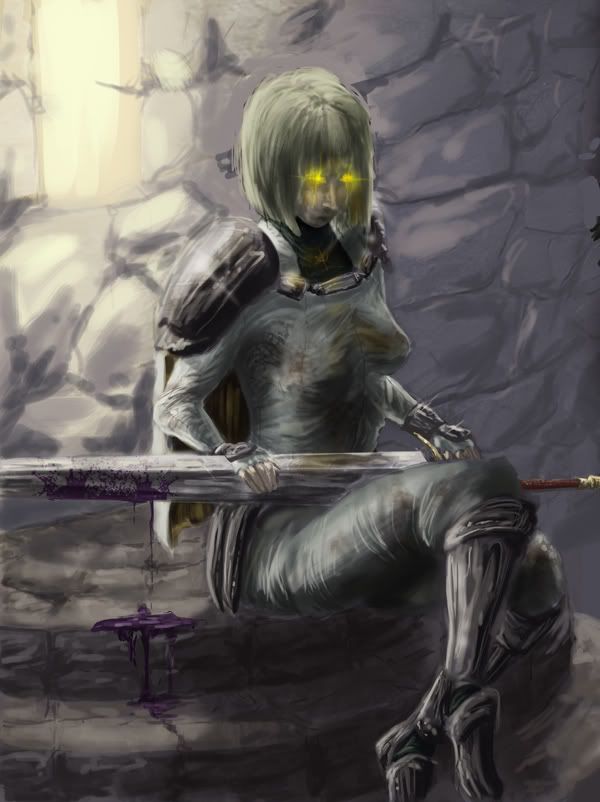
Finally, I adjusted contrast and did some colour balancing to really make the image pop. then I applied a hard light gradient in a circular pattern on the window, and adjusted the textures on the back wall with a texture brush for dirt. I think applied a gaussian blur to the wall textures to really draw the focus to the character. All told this piece probably took about 5 hours of work.
Here's the final:

Fascinating! Cool post.
ReplyDelete--
Capt. Charles Bukowski of the Guard at Desh (Hark)
Claymore is teh awsomz.
ReplyDeleteAlso, I really appreciated you leading us through the process. It was very enlightening.
And the youma blood on the sword is damn sexy.
Thanks guys. It's funny because I work differently almost every time I tackle a new piece, but since I had a bunch of the frames pretty well ready to go anyway, I thought I'd try my hand at it.
ReplyDeleteI was pretty happy with the Yoma blood. Funnily enough it's the same custom brush I used for the splashes in the Ursadon piece, I just put x-jitter on it and did a couple of touch ups.
I'm thinking I'll try and do a full on tutorial for one of my creatures in the future. Probably upwards of 8 process shots so I can lead all the way from outline to final. That will depend a lot on what the next COW topic I tackle is.