Step 6: Rendering the Creature
After having gotten a basic idea of what I want the creature to look like from doing it's head, I can now move on to rendering all aspects of the creature. I began to create value and form on it's body, and made the chiton plates on it's arms. You may not be able to tell from these screenshots, but I actually flip my images around quite a bit. I've said it before and I'll say it again, make "flip image horizontal" into a basic hotkey or assign it to a tablet function key. Flipping the image allows one to easily see basic errors and compositional flaws. I began to really establish the cold green reflected light from the leaf below to define the underside's forms. I also decided on defining a bit more of the background. All of this is using basic normal layers doing straight painting. I used a grainy rake brush to get the texture of fibres within the leaves and the twigs, but everything else was a standard spatter brush with "wet edges".
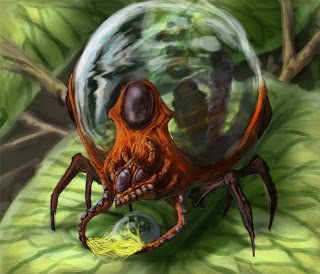
Step 7: Detailing
At this point I really felt that the exoskeleton of the creature was a bit bland. The previous speckling attempt didn't work out so well, I wanted spots that looked and felt good with the scale of the creature, so I created a custom brush for the speckle-pattern set size jitter and x and y jitter on, then began to disperse the pattern on a multiply layer with low opacity. I used a layer mask to get the pattern in the right places in the same way I would do a texture overlay. Then I noticed that the neck tubes didn't really stick out at all, they just sort of melded into the rest of the creature, so I set a layer to overlay and gave them a more desaturated, purpler colour. I gave the lower, smaller droplet some more detailing and smudged it a bit, then I defined the bug being digested in the big drop a bit more and gave it the water effect treatment. This step was really about refining the details to make the creature more believable.
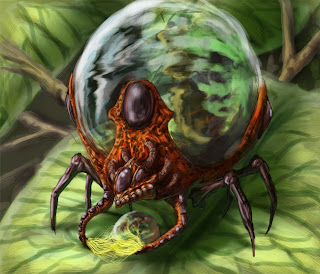
Step 8: Details and Touchups
Only a few things were really left to do at this stage. I used this opportunity to get the main leaf a lot more defined and real, I used a texture overlay of a real leaf, then painted over top of it, then I used multiply layers to define some shadows of where the bug was. I also added details like the fibres on it's legs. Then, I saw a couple of problems of contrast and composition. I defined the foliage in the background a bit more, darkened up the whole thing and then applied a Gaussian blur to most of it to make it really become secondary to the focus (the creature and it's leaf). Seeing that some of the creature lacked form I decided to do a matte highlight on it's light-exposed areas to bring out the darks.
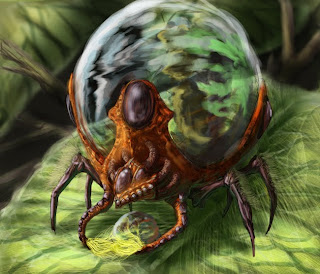
Step 9: Finishing Up
Despite it's title this is the second last step. To go along with the image I used the creature's form to create a silhouette of sorts that would display how the creature looks when it has no dewdrop in it's "crown" so to speak. I then decided to add in a second diagram that would illustrate the top of the creature and what the inside of the "crown" looked like to help explain how it released digestive enzymes into the droplet. After that I created a sort of jungle watermark background and threw it together with the step 8 image. Then I saved it and walked away for about 3 hours. When I came back I had 2 realizations...
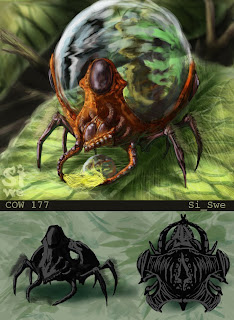
Step 10: Final Touch Ups and Presentation
... The first one was that the leaf it was resting on was incredibly busy. It contrasted poorly with the leg fibres and created a busy image. In addition, the matte highlights washed out a lot of the red I really liked and eliminated a lot of the patterning. I started by simplifying some stuff on the leaf while adding in some highlights in the shadows to show light coming up through the leaf. Then I worked upping the contrast levels between the leg fibres and the leaf colour. Finally I took off the highlight layer and instead defined the shadowed areas a bit more. Then I worked with some final detailing on the creature before calling the image done. I re-paired it with it's counterpart image and used some tree-brushes I had to create a silhouetted treeline on either side of the info bar. Then I added my "Si_Swe" watermark in the corner, trying to make it a close colour to the leaf so as not to make the image busier than it already was, and called it done. Here's the final:
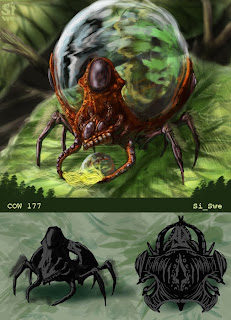
I hope that helps with a bit of understanding on how I work and junk.
No comments:
Post a Comment